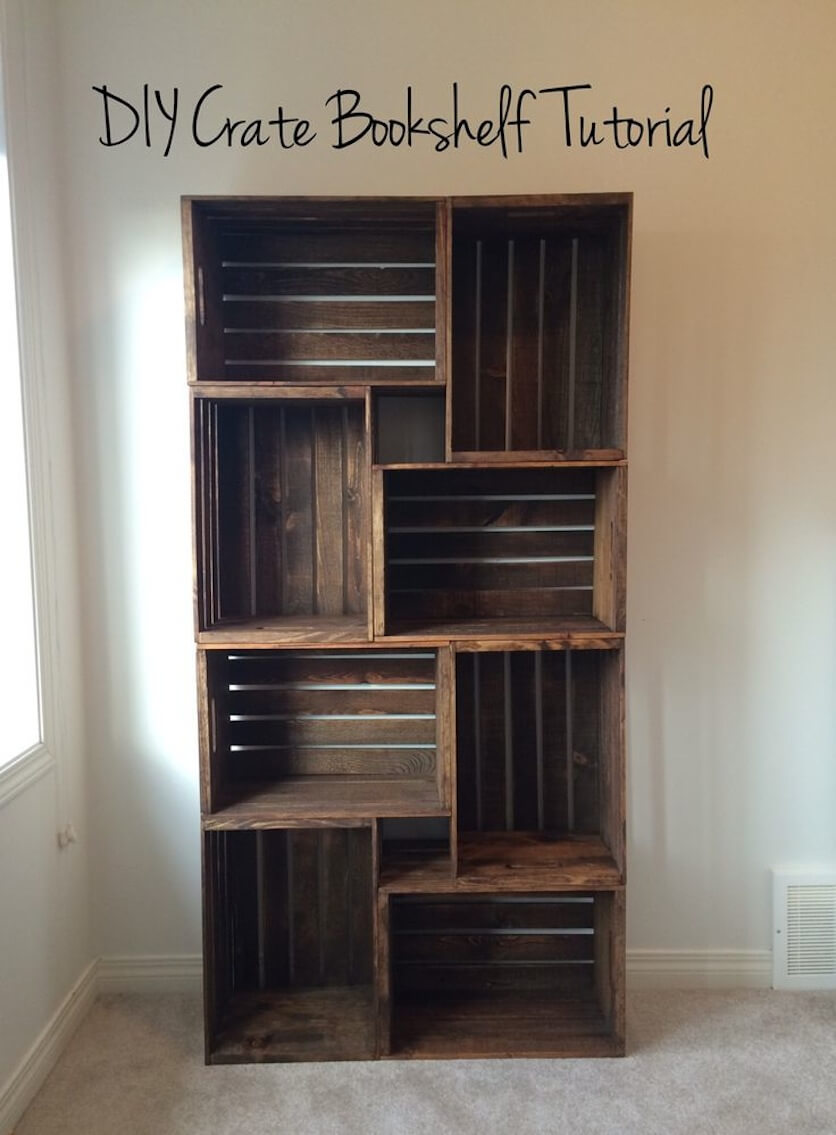
Looking for a unique and stylish way to add storage and character to your home? Building a DIY wooden crate shelf is the perfect solution! This project is easy, affordable, and allows you to personalize your creation with different crate styles, wood finishes, and decorative touches.
Materials You'll Need:
Wooden crates: Choose crates in different sizes and styles to create visual interest. You can find them at flea markets, antique shops, or even repurpose old crates.
Wood board: This will form the base of your shelf. Choose a length and width to accommodate your crates and desired shelf size.
Wood screws: Use screws long enough to securely attach the crates to the base board.
Wood glue: Optional, but recommended for added stability.
Wood stain or paint: Personalize your shelf with your favorite colors and finishes.
Sandpaper: Smooth out rough edges and prepare the wood for staining or painting.
Level: Ensure your shelf is level for a professional look.
Measuring tape: For precise measurements.
Drill: For drilling pilot holes before attaching the crates.
Screwdriver: For attaching the crates.
Step-by-Step Instructions:
1. Gather your materials and prep your workspace: Clean and prepare your crates by removing any dirt or debris. Sand any rough edges for a smooth finish. If you're using reclaimed crates, check for any loose boards or screws that need to be tightened.
2. Choose the arrangement and layout of your crates: Experiment with different combinations of crates to create a visually appealing design. Make sure the base board is long and wide enough to support the crates.
3. Measure and mark the positions of the crates on the base board: Use a measuring tape and pencil to mark the exact placement of each crate. Ensure that the crates are evenly spaced and aligned.
4. Drill pilot holes: This prevents the wood from splitting when you screw the crates to the base. Drill pilot holes in the bottom of each crate at the marked positions.
5. Attach the crates to the base board: Apply wood glue to the bottom of each crate, then carefully attach the crates to the base board using screws.
6. Sand and finish: Once the crates are securely attached, sand the entire shelf to create a smooth surface. Then, apply your chosen wood stain or paint, letting it dry completely between coats.
7. Level and install: Use a level to ensure the shelf is straight and secure. You can mount it on a wall using brackets or place it on a shelf unit or table for a free-standing design.
Tips for Customization:
Add brackets or legs: For added stability, consider attaching brackets to the bottom of the shelf or adding legs to create a freestanding unit.
Decorative touches: Use rope, wire, or metal accents to create unique design elements.
Upcycled elements: Incorporate other repurposed materials like metal gears, old keys, or wooden blocks into your shelf design.
Lighting: Add fairy lights or string lights for a warm and inviting ambiance.
Enjoy your rustic and charming DIY wooden crate shelf! This project can be adapted to fit any space and style, offering a practical and decorative solution for organizing your home. Let your creativity shine and have fun with it!
DIY Wooden Crate Shelf: A Rustic Addition to Your Home Decor
Make Your Own Wooden Welcome Sign
You'll Need:
Wood: A piece of plywood, reclaimed wood, or even a wooden door. The size depends on your desired sign dimensions.
Tools:
Saw (circular saw or jigsaw)
Drill
Sandpaper (various grits)
Screwdriver
Measuring tape
Pencil
Materials:
Stain or paint (for the wood)
Paintbrushes
Stencil (optional)
Wood glue
Screws
Metal or wooden letter (or make your own with wood!)
Optional:
Hanging hardware (wire, rope, hooks)
Decorative elements (flowers, greenery, ribbons)
Instructions:
1. Plan Your Design:
Decide on the size and shape of your sign.
Choose the style and font for your welcome message.
Think about any decorative elements you want to add.
Sketch out your design on paper.
2. Cut the Wood:
Use a saw to cut the wood to your desired size and shape.
Sand the edges smooth with sandpaper.
3. Prepare the Surface:
Sand the entire surface of the wood to create a smooth finish.
If desired, apply a coat of stain or paint to the wood. Let it dry completely.
4. Apply Letters:
You can either use a stencil to paint your letters directly onto the wood or attach pre-made letters.
If using pre-made letters, use wood glue and/or screws to secure them to the wood.
If painting letters, use a steady hand and let each coat dry completely before applying the next.
5. Add Decorative Elements (Optional):
If you're using decorative elements, attach them to the wood with wood glue or screws.
Be creative and use anything that speaks to you!
6. Finish Touches:
Apply a sealant to the wood to protect it from the elements.
Attach hanging hardware to the back of the sign.
7. Hang Your Sign:
Find a prominent spot for your welcome sign and hang it up.
Here are some ideas for personalizing your sign:
Use a family name or monogram.
Incorporate a quote or motto that is special to you.
Add a floral wreath or other natural elements.
Use different textures and materials for a unique look.
Get creative with the shape of your sign!
Tips:
Start with a simple design and work your way up to more complex ones.
Practice your lettering on scrap wood before applying it to your sign.
Take your time and enjoy the process!
Enjoy your handcrafted welcome sign!
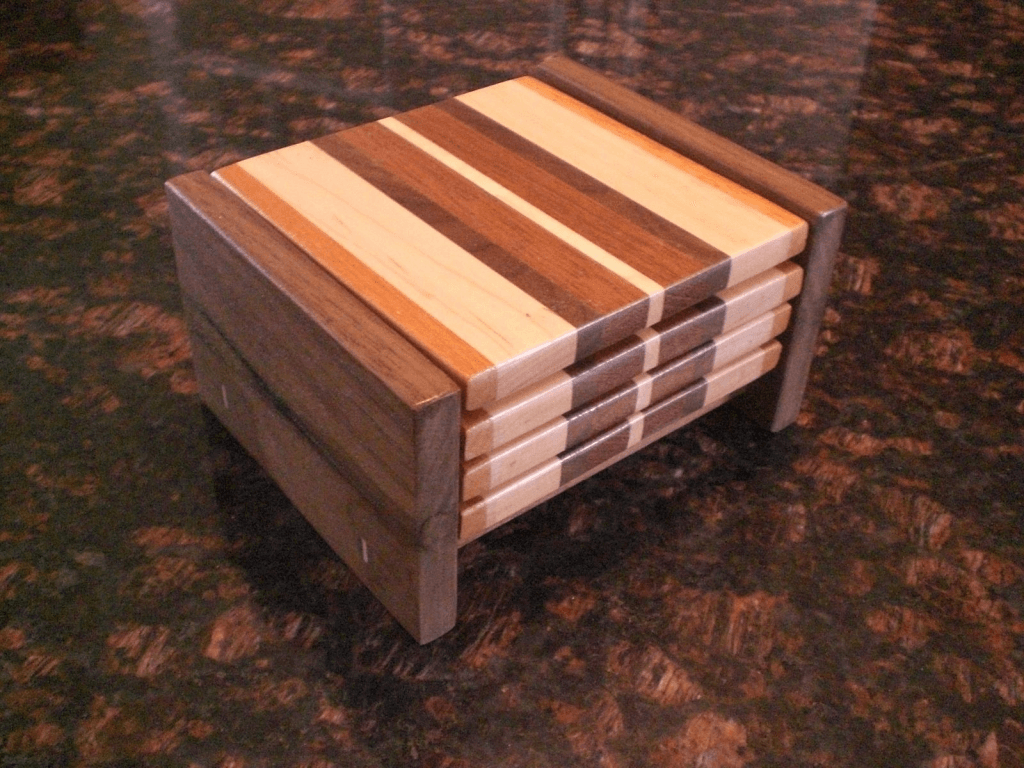
DIY Wooden Coasters: Protect Your Surfaces in Style
Introduction:
Tired of unsightly water rings on your beautiful furniture? Spruce up your home decor and protect your surfaces with stylish, personalized DIY wooden coasters! This project is easy, fun, and allows you to unleash your creativity.
Materials:
Wood: Choose your preferred wood type.
Softwoods (Pine, Fir): Budget-friendly, lightweight, but prone to scratches.
Hardwoods (Maple, Oak): Durable, beautiful grain patterns, but more expensive.
Plywood: Affordable, stable, good for beginners.
Cutting tools:
Jigsaw/Circular Saw: Cutting out the coaster shapes.
Sandpaper: Smooth the edges and surfaces (various grits for progressively finer finishes).
Finishing Supplies:
Wood stain (optional): Enhances the wood's natural beauty.
Wood sealer: Protects the wood from water damage and stains.
Polyurethane: Durable, water-resistant coating for added protection.
Decorative elements (optional):
Stencils: Create intricate designs.
Paint: Add vibrant colors.
Decoupage medium: Attach fabric, paper, or other materials.
Cork tiles or felt pads: Prevent scratching and sliding.
Glue: Secure cork/felt pads to the coaster base.
Instructions:
1. Cut the coaster shapes: Measure and mark your wood to create your desired coaster size and shape (square, round, etc.). Use a jigsaw or circular saw to carefully cut the shapes.
2. Sand the edges and surfaces: Start with coarser grit sandpaper (80-120 grit) to remove any rough edges and gradually progress to finer grits (220-400 grit) for a smooth finish.
3. Apply stain (optional): Apply a wood stain to enhance the natural color and grain patterns. Follow the stain's instructions for application and drying time.
4. Apply sealant or polyurethane: Seal the wood with a wood sealer or polyurethane to protect it from spills and moisture. Again, follow the product's instructions.
5. Decorate (optional): Use stencils and paint, decoupage techniques, or other creative methods to personalize your coasters. Let the decorative elements dry completely.
6. Attach cork or felt pads: Cut cork tiles or felt pads to the size of your coasters. Apply glue to the bottom of the coasters and carefully attach the pads. Allow the glue to dry completely.
Tips and Tricks:
Use a template: Create a cardboard template for consistent shapes.
Use a sanding block: For a smoother finish, use a sanding block to apply even pressure.
Work in a well-ventilated area: Wear a mask and work in a well-ventilated area when using stains, sealants, and paints.
Experiment with different finishes: Try various stains, paints, and decorative techniques to personalize your coasters.
Create a coaster set: Make a set of different shapes, colors, or designs for a cohesive look.
Enjoy your beautiful, personalized DIY wooden coasters! These unique pieces will not only protect your surfaces but also add a touch of warmth and personality to your home decor.
How to Make a Wooden Chess Board: A Classic Game in a Customizable Style
Crafting your own chessboard is a rewarding project that lets you express your personal style while creating a cherished heirloom. Here's a comprehensive guide to help you through the process:
1. Planning and Design:
Board Size: Standard chessboards are 19" x 19", but you can adjust this based on your preference and space.
Wood Choices: Consider the aesthetic and durability of different wood types:
Dark Squares: Ebony, rosewood, wenge, walnut, mahogany.
Light Squares: Maple, ash, cherry, birch, sycamore.
Frame: Hardwoods like oak or walnut for strength and visual appeal.
Style: Choose a design that reflects your taste:
Classic: Simple, elegant design with contrasting wood colors.
Modern: Geometric patterns, contrasting wood grains, or inlay techniques.
Rustic: Reclaimed wood, distressed finishes, or unique grain patterns.
Inlays: Add decorative elements like wood inlays or metal accents.
2. Gathering Materials and Tools:
Wood: Purchase enough wood for the squares, frame, and any inlays.
Power Tools: Table saw, jointer, planer, router (optional).
Hand Tools: Hand saw, chisels, sandpaper, glue, clamps.
Finishing Supplies: Wood filler, stain, varnish, paint (optional).
Chess Pieces: Choose a set that complements your board design.
3. Preparing the Wood:
Cut Squares: Use a table saw to cut the wood into squares for each chessboard square.
Jointing and Planing: Ensure flat surfaces by jointing and planing the squares.
Frame: Cut the frame pieces to size and join them with miter joints or rabbet joints.
4. Assembly:
Laying Out Squares: Arrange the squares in a checkerboard pattern on a flat surface.
Gluing and Clamping: Apply wood glue to the back of each square and press them together, clamping firmly to ensure a tight bond.
Attaching the Frame: Glue the frame to the chessboard, making sure it's flush with the edges of the squares.
Sanding: Sand the entire board smooth, using progressively finer grits.
5. Inlay and Finishing:
Inlay (Optional): If desired, cut out small squares or shapes from contrasting wood to create inlaid designs. Use glue and clamps to secure the inlays.
Filling Gaps: Fill any gaps or imperfections with wood filler.
Sanding: Sand the filled areas smooth.
Finishing: Apply stain, varnish, or paint according to your chosen design. Several coats may be necessary.
6. Adding Finishing Touches:
Distressing (Optional): Add a rustic look by distressing the board with sandpaper, steel wool, or a wire brush.
Sealant: Apply a sealant to protect the finish and enhance durability.
Chess Pieces: Choose a set of chess pieces that complements your board and add a touch of elegance.
Tips for Success:
Plan carefully: Consider the design, wood choices, and finishing techniques beforehand.
Precise measurements: Accurate measurements are crucial for a well-proportioned board.
Cleanliness: Keep your workspace clean to prevent dust and debris from affecting the finish.
Patience: Take your time and enjoy the process.
Practice: Start with smaller projects before attempting a full-size chessboard.
With careful planning, attention to detail, and a bit of creativity, you can craft a beautiful and unique wooden chessboard that will be cherished for years to come.
Build a Wooden Serving Platter: Impress Your Guests with Your DIY Skills
Introduction:
Creating a beautiful and unique wooden serving platter is a great way to elevate your home decor and impress guests at your next gathering. This DIY project combines woodworking skills with a touch of creativity, allowing you to personalize the platter to your liking. Let's get started!
Materials:
Wood: Choose a sturdy hardwood like walnut, maple, cherry, or oak. You'll need a piece approximately 12" x 16" for a standard platter size.
Wood glue: For securing the wood pieces together.
Wood screws: For extra strength and stability (optional).
Sandpaper: Various grits (80, 120, 220) for smoothing the wood surface.
Wood finish: Choose from oil, wax, or polyurethane based on your preference and desired look.
Measuring tape: To ensure accurate dimensions.
Pencil: To mark the wood for cutting and sanding.
Circular saw or jigsaw: For cutting the wood to shape.
Safety glasses and ear protection: Essential for woodworking safety.
Optional:
Wood burning tool: For adding decorative elements.
Router: For creating intricate edges or patterns.
Wood carving tools: For adding personalized designs.
Instructions:
1. Prepare the wood: Measure and mark your wood piece to the desired size and shape of your platter. Cut the wood using a circular saw or jigsaw, ensuring clean and precise cuts.
2. Sand the wood: Smooth out any rough edges and inconsistencies with sandpaper, starting with coarse grit and progressing to finer grits for a smooth finish.
3. Add optional decorative elements: If desired, use a wood burning tool, router, or carving tools to add intricate designs or personal touches to your platter.
4. Apply wood finish: Apply your chosen wood finish according to the manufacturer's instructions. Allow ample drying time for the finish to cure.
5. Enjoy your creation: Your handcrafted wooden serving platter is ready to showcase your culinary creations and add a touch of warmth to your home.
Tips:
Experiment with shapes: Consider oval, rectangular, or even custom-designed shapes for your platter.
Enhance with details: Add a decorative border, hand-carved accents, or unique handles to enhance your platter's personality.
Choose the right wood finish: Oil offers a natural look, wax provides a protective coating, and polyurethane creates a durable, glossy finish.
Practice safety: Always wear safety glasses and ear protection when using power tools.
Conclusion:
Building a wooden serving platter is a rewarding DIY project that allows you to express your creativity and craftsmanship. From simple to intricate, the possibilities are endless. With a few basic tools and some patience, you can create a beautiful and functional piece that will be cherished for years to come. So grab your woodworking tools and unleash your inner artisan!
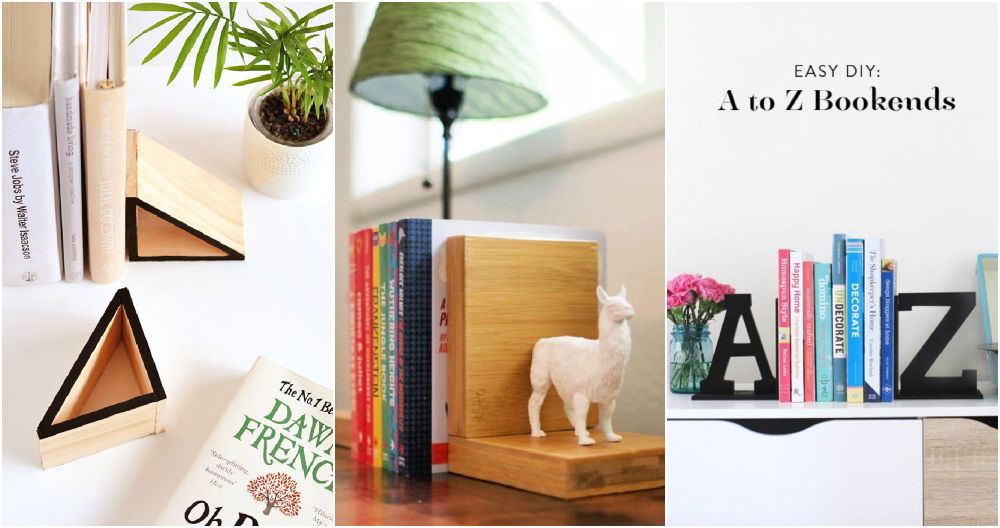
Create Your Own Wooden Bookends: Personalized Décor
Introduction:
Looking to add a touch of personality and functionality to your bookshelf? Creating your own wooden bookends is a fun and rewarding project that allows you to showcase your creativity and style. This guide will walk you through the process, from material selection to customization, so you can craft beautiful and unique bookends that reflect your personal taste.
Materials:
Wood: Choose a type of wood that suits your style and project. Popular options include:
Hardwoods: Oak, maple, walnut (for durability and rich grain patterns)
Softwoods: Pine, cedar, birch (for ease of carving and affordability)
Reclaimed wood: Adds character and sustainability
Wood glue: For securing pieces together
Wood filler: For patching imperfections
Sandpaper: Various grits for smoothing and finishing
Wood stain or paint: To color and protect your bookends
Polyurethane or varnish: For a durable finish
Optional:
Hardware: Screws, hinges, or decorative accents
Cutting tools: Saw, drill, chisel
Measuring tape: For accurate dimensions
Pencil: For marking
Templates: For intricate designs
Steps:
1. Design and Planning:
Sketch or draw: Begin by visualizing the design of your bookends. Consider the size, shape, and style you want to achieve.
Determine dimensions: Measure the width and height of your books to ensure the bookends will be the appropriate size.
Choose a theme: Explore different themes like nature, animals, geometric shapes, or abstract designs.
Consider the wood: Select a wood type that complements your design and aesthetic.
2. Cutting and Shaping:
Cut the wood: Using a saw or jigsaw, cut the wood according to your planned dimensions. Remember to create two identical pieces for the bookends.
Shape the base: If desired, shape the bottom of each piece into a slightly wider base for stability.
Create the design: Use tools like chisels, wood carving tools, or a drill to sculpt your desired shape or design.
3. Assembly and Finishing:
Glue and secure: If your design involves multiple pieces, use wood glue to join them together. Ensure a strong bond by clamping the pieces together until the glue dries.
Sanding: Use sandpaper to smooth out any rough edges and create a consistent surface for the finish. Start with coarse grit and gradually progress to finer grits.
Filling imperfections: Use wood filler to patch any holes or imperfections in the wood. Allow the filler to dry completely before sanding again.
Finishing touches: Apply wood stain or paint according to your desired color scheme. Let the stain or paint dry completely before applying a protective coating.
4. Customization and Personalization:
Add unique elements: Incorporate personal touches like engraved initials, family crests, or a favorite quote.
Use decorative hardware: Attach screws, hinges, or other hardware to enhance the design and functionality.
Incorporate found objects: Use natural elements like stones, shells, or driftwood to create a unique and organic look.
5. Enjoy your Bookends:
Display with pride: Place your handcrafted bookends on your bookshelf to showcase your creativity and add a personal touch to your space.
Share your passion: Consider sharing your bookends as a unique gift for friends and family.
Safety Precautions:
Always wear safety glasses and dust masks when working with wood and tools.
Use caution when operating power tools and follow safety instructions.
Keep work areas clean and organized.
Conclusion:
Creating your own wooden bookends is a rewarding and enjoyable project that combines creativity, skill, and personalized expression. By following this guide and incorporating your own ideas, you can craft stunning and unique bookends that become treasured pieces in your home. Enjoy the process of crafting your own personalized décor!
DIY Wooden Phone Stand: Convenient Accessory for Your Devices
Introduction:
Tired of your phone constantly falling over or awkwardly perched on a stack of books? A DIY wooden phone stand is the perfect solution! This project is easy, affordable, and allows you to personalize your device holder to match your style.
Materials:
Wood: You can use scrap wood, a small piece of plywood, or even a wooden dowel.
Saw: Hand saw, jigsaw, or miter saw.
Sandpaper: Different grits for smoothing the wood.
Wood glue: For joining the pieces together.
Clamps: To hold the pieces in place while the glue dries.
Paint or stain: Optional, for a customized look.
Finishing coat: Polyurethane or varnish for protection.
Design Options:
There are countless designs for phone stands. Here are a few ideas to get you started:
Simple L-shape: This is the easiest to make. Cut two pieces of wood, one shorter than the other. Glue them together at a 90-degree angle.
Triangle shape: Cut three pieces of wood to form a triangle. Glue the pieces together.
Rounded stand: Use a wooden dowel or carve a piece of wood into a curved shape.
Elevated stand: Add a base to raise the phone higher.
Multi-device stand: Create a stand with space for multiple devices, like a phone and tablet.
Instructions:
1. Plan your design: Choose a design and sketch it out on paper. Measure your phone and choose appropriate wood dimensions.
2. Cut the wood: Using a saw, cut the wood pieces to your desired sizes.
3. Sand the wood: Smooth out any rough edges and imperfections with sandpaper.
4. Assemble the pieces: Apply wood glue to the joining surfaces and clamp the pieces together. Let the glue dry completely.
5. Finish the stand: Once the glue is dry, sand the stand again for a smooth finish. Apply paint or stain if desired. Let it dry completely.
6. Apply a protective coat: Finish the stand with a polyurethane or varnish for durability and protection.
Tips:
Use a miter saw for precise cuts.
Clamp the pieces firmly together while the glue dries.
Apply multiple coats of paint or stain for a rich color.
Sand the wood thoroughly between coats.
Let the finishing coat dry completely before using the stand.
Conclusion:
Now you have a stylish and functional wooden phone stand! You can personalize it with paint, stain, or even embellishments. This DIY project is a great way to add a touch of character to your workspace or bedside table.
How to Make a Wooden Desk Lamp: Stylish and Functional Lighting
You'll need:
Materials:
Wood: Choose a sturdy, attractive wood like oak, walnut, maple, or cherry. The size and shape of the wood will depend on your design.
Electrical cord: A suitable cord with a switch and plug.
Light bulb socket: Choose a socket that fits the size and wattage of the bulb you want to use.
Light bulb: Select a bulb type and wattage that is appropriate for your design and needs.
Wood glue: A strong wood glue, like Titebond.
Wood screws: Choose screws that are long enough to secure the parts together.
Sandpaper: A range of grit sandpaper for smoothing and finishing.
Wood finish: Choose a finish that complements the wood, such as oil, varnish, or stain.
Hardware: This could include hinges, knobs, or other decorative elements.
Tools:
Saw: Choose a saw suitable for cutting the wood, such as a circular saw, table saw, or hand saw.
Drill: For drilling pilot holes for screws and mounting the electrical components.
Screwdriver: For attaching the parts together.
Clamps: For holding the pieces together while gluing.
Measuring tape: For accurate measurements.
Pencil: For marking the wood.
Sanding block: For smoothing the wood after cutting.
Brush: For applying the wood finish.
Step-by-Step Instructions:
1. Design and Plan:
Sketch out your desired lamp design on paper.
Decide on the size, shape, and features of your lamp.
Measure the wood and cut it to the necessary sizes.
2. Build the Base:
Cut the base pieces according to your plan.
Glue and screw the pieces together, using clamps to hold them securely.
Sand the base smooth and even.
3. Build the Lamp Body:
Cut the body pieces according to your plan.
Glue and screw the pieces together, using clamps to hold them securely.
Sand the body smooth and even.
4. Assemble the Lamp:
Attach the body to the base, making sure it is centered and securely attached.
Drill a hole for the electrical cord to pass through.
Mount the light bulb socket securely to the body.
5. Install the Electrical Components:
Connect the electrical cord to the light bulb socket, following all safety guidelines.
Test the wiring to ensure it is working properly.
6. Finish the Lamp:
Sand the entire lamp smooth, removing any sharp edges.
Apply the wood finish of your choice.
Let the finish dry completely.
7. Add Hardware:
Add any decorative hardware, such as hinges, knobs, or other elements.
8. Final Touches:
Clean the lamp thoroughly.
Install the light bulb.
Tips:
Use a drill press for accurate hole drilling.
Sand the wood in the direction of the grain.
Use clamps to ensure a strong bond while gluing.
Test the wiring thoroughly before using the lamp.
Consider adding a switch to the electrical cord for convenience.
Safety Precautions:
Always work in a well-ventilated area.
Wear safety glasses and gloves while working with tools.
Disconnect the power before working on the electrical components.
Follow all manufacturer instructions for using tools and electrical components.
Customization:
Experiment with different wood types, finishes, and hardware to create a unique and personalized lamp.
Add decorative elements like inlays, carvings, or paint details.
Choose a light bulb that creates the desired ambience.
Enjoy your stylish and functional wooden desk lamp!
Build Your Own Wooden Planters: Customizable Garden Décor
Introduction:
Tired of generic planters? Want to add a touch of personal style to your garden? Building your own wooden planters is a fun and rewarding project that allows you to create unique and functional pieces that perfectly complement your outdoor space.
Materials You'll Need:
Wood: Choose a durable and rot-resistant wood like cedar, redwood, or treated pine.
Saw: A circular saw or table saw for precise cuts.
Measuring tape & pencil: For accurate measurements and markings.
Screws & drill: For assembling the planter.
Wood glue: For added stability and moisture resistance.
Sandpaper: For smoothing edges and surfaces.
Wood stain or paint (optional): To enhance the look and protect the wood.
Plastic liner: To prevent soil from leaking and protect the wood.
Project Options:
Classic Rectangular Planter: Simple and versatile, perfect for herbs, flowers, or small vegetables.
Elevated Planter: Raise your plants off the ground for better drainage and a more modern look.
Tiered Planter: Create a multi-level display for a variety of plants.
Trellis Planter: Combine a planter with a trellis for climbing plants.
Step-by-Step Instructions:
1. Design & Planning:
Decide on the type of planter you want to build and its dimensions.
Sketch your design and create a detailed plan with measurements.
2. Cutting the Wood:
Cut the wood pieces according to your plan using the saw. Be precise with your cuts!
3. Assembling the Planter:
Use screws and wood glue to join the wood pieces together.
Ensure the planter is sturdy and secure.
4. Sanding & Finishing:
Sand the edges and surfaces of the planter smooth to prevent splinters.
Apply wood stain or paint (optional) to protect the wood and enhance its look.
5. Adding the Liner:
Cut a piece of plastic liner slightly larger than the inside dimensions of the planter.
Secure the liner inside the planter using staples or tape.
6. Planting Your Plants:
Fill the planter with potting soil and plant your favorite flowers, herbs, or vegetables.
Customization Tips:
Add decorative details: Carve designs, attach hardware, or use decorative screws for a unique touch.
Use reclaimed wood: Give old wood a new life and create a rustic look.
Paint with a pattern: Choose a vibrant color scheme and create a geometric or artistic design.
Integrate other materials: Combine wood with metal, stone, or other materials to create a one-of-a-kind planter.
Enjoy Your Creation:
Your handcrafted wooden planter is now ready to showcase your green thumb and add a touch of rustic charm to your garden! With a little creativity, you can build a custom piece that reflects your personal style and enhances the beauty of your outdoor space.
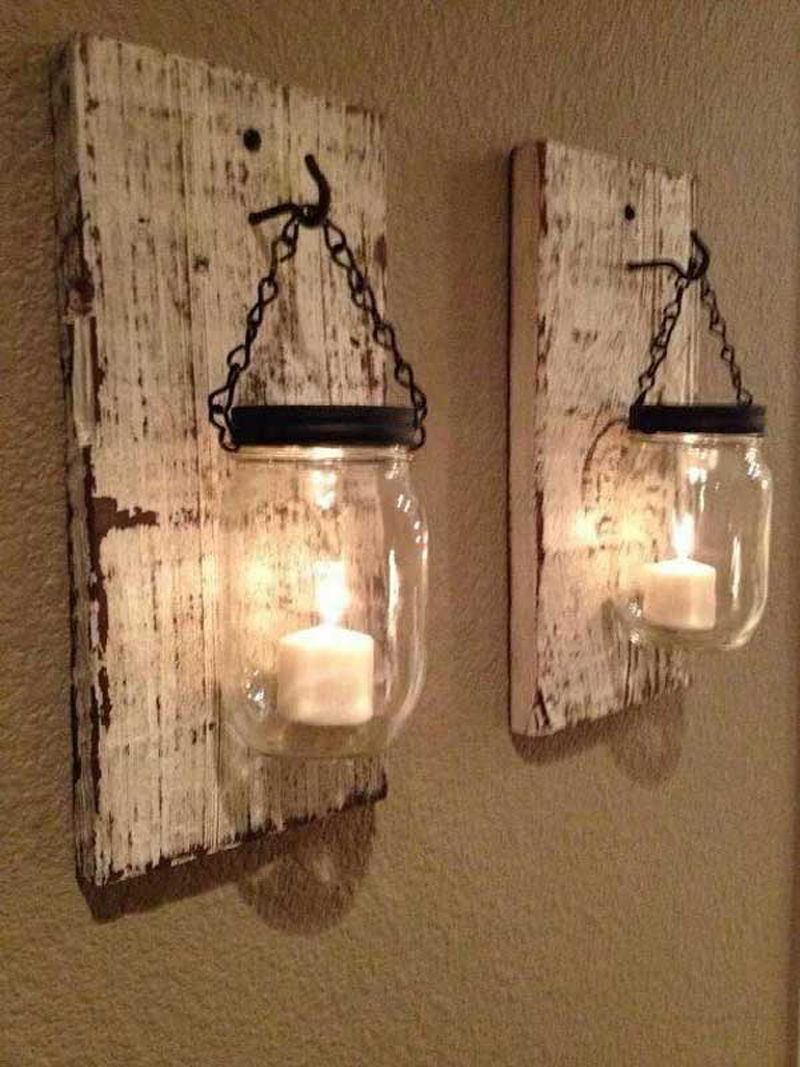
DIY Wooden Wall Sconces: Unique Lighting for Your Home
Want to add a touch of warmth and character to your home decor? DIY wooden wall sconces are a fantastic way to personalize your space and create unique lighting solutions. This project is surprisingly easy, even for beginners, and allows for endless creativity with different wood types, shapes, and lighting options.
Here's a step-by-step guide to help you build your own wooden wall sconces:
Materials:
Wood: Choose your preferred type, such as reclaimed wood, plywood, or pine. The thickness should be at least 1/2 inch.
Lighting Fixture: You can use an existing fixture, or purchase a new one from a hardware store. Consider the size and style of your sconce.
Hardware: Screws, nuts, washers, wire connectors, and wire strippers.
Paint or Stain: Choose a color or finish that complements your decor.
Sandpaper: To smooth out the wood and prepare it for finishing.
Measuring Tape and Pencil: For marking and cutting.
Saw: For cutting the wood.
Drill: For drilling holes for the fixture and wires.
Safety Glasses and Gloves: For safety during the construction process.
Instructions:
1. Design and Cut: Sketch out your sconce design on paper. Consider the shape, size, and any decorative elements you want to incorporate. Cut the wood to your desired dimensions using a saw.
2. Sand and Finish: Smooth the edges of your wooden pieces with sandpaper. If using reclaimed wood, be sure to sand it thoroughly. Then, apply your chosen paint or stain. Allow it to dry completely.
3. Mount the Fixture: Decide on the placement of the light fixture. Mark the location and drill a hole for the mounting screws. Attach the fixture to the wood.
4. Wire the Fixture: Carefully disconnect the power to the area you are working in. Follow the instructions provided with the light fixture for wiring. Use wire connectors to join the wires securely.
5. Mount the Sconce: Drill pilot holes for the mounting screws into the wall. Attach the sconce to the wall using the screws. Make sure the sconce is level before tightening the screws.
6. Connect Power: Reconnect the power and test the lighting.
7. Finishing Touches: You can add decorative elements to personalize your sconces, such as metal accents, glass panels, or etched designs.
Tips and Ideas:
Reclaimed wood: Adds character and sustainability to your project.
Geometric shapes: Create a modern look with triangles, squares, or circles.
Rustic finish: Sand down the edges for a weathered look.
Metal accents: Incorporate metal brackets or hooks for a unique touch.
Multiple lights: Use a string of lights or multiple light bulbs for added warmth and ambiance.
Add a switch: Make it easy to turn your sconce on and off with a wall-mounted switch.
Safety Considerations:
Always disconnect the power before working with electrical components.
Wear safety glasses and gloves during the construction process.
Use appropriate tools and techniques for your skill level.
Ensure the wiring is secure and meets local electrical codes.
With a little creativity and effort, you can create beautiful and functional DIY wooden wall sconces that will add warmth and personality to your home. Enjoy the process and personalize your sconces to reflect your unique style!
How to Make a Wooden Fruit Bowl: A Chic Addition to Your Kitchen
A wooden fruit bowl is a timeless and elegant addition to any kitchen. It not only holds your fruit beautifully but also adds a touch of warmth and natural beauty to your space. Making your own wooden fruit bowl is a rewarding project that allows you to personalize it to your taste. Here's how:
Materials:
Wood: Choose a hardwood like cherry, maple, or walnut for durability and a beautiful grain pattern. You'll need a piece of wood around 12" in diameter and 1" thick.
Woodworking tools:
Circular saw
Drill
Sandpaper (various grits)
Wood glue
Clamps
Safety glasses and dust mask
Finishing oil or wax (optional)
Bowl template: You can find free templates online or trace a large bowl onto a piece of paper.
Instructions:
1. Prepare the wood:
Cut the wood to your desired size using a circular saw.
Sand the wood smooth with sandpaper, starting with rougher grits and progressing to finer ones.
2. Create the bowl shape:
Use a drill to create a series of holes around the center of the wood, gradually increasing in size.
Connect the holes with a jigsaw or carving tool to create the desired bowl shape.
You can also use a router to create a more precise and smooth edge.
3. Shape the bowl:
Once you have the basic bowl shape, use a rasp or sandpaper to refine the edges and create a smooth, flowing curve.
Be careful not to sand too much, as you don't want to weaken the wood.
4. Finishing touches:
Apply wood glue to any cracks or gaps in the bowl. Clamp the pieces together until the glue dries completely.
Once the glue is dry, sand the bowl again to smooth any imperfections.
If desired, apply a finishing oil or wax to protect the wood and enhance its natural beauty.
Tips:
Practice on scrap wood: It's a good idea to practice cutting and shaping on a scrap piece of wood before working on your final piece.
Take your time: This project requires patience and attention to detail. Don't rush the process, and take your time to get the desired shape and finish.
Be creative: You can customize your wooden fruit bowl by carving designs or adding decorative elements.
Additional Ideas:
Use different wood types: Experiment with different types of wood to create unique and interesting bowls.
Add a handle: A handle can make it easier to carry the bowl.
Create a set: Make multiple bowls in different sizes for serving different fruits.
By following these steps, you can create a beautiful and functional wooden fruit bowl that will add a touch of elegance and craftsmanship to your kitchen. Remember to use caution when working with power tools and always wear safety glasses and a dust mask.
Build a Wooden Storage Chest: Practical and Stylish Furniture
This guide will help you build a sturdy and stylish wooden storage chest, perfect for adding functional storage to your home.
Materials:
Wood:
Bottom & Top: 1/2" plywood, 1 piece cut to size (depending on desired chest dimensions)
Sides & Ends: 1x6" boards, 4 pieces cut to length (same height as desired chest)
Lid frame: 1x2" boards, 4 pieces cut to length (same length as desired chest minus ~1/4" for rabbet)
Lid Top: 1/4" plywood, 1 piece cut to size (same dimensions as lid frame)
Hardware:
Hinges (2, heavy-duty for larger chests)
Lid stay (optional, for easier opening)
Wood glue
Screws (appropriate size for your wood)
Finishing:
Wood stain (optional)
Wood sealer (optional)
Paint (optional)
Tools:
Table saw or circular saw
Miter saw (optional)
Drill and drill bits
Screwdriver
Clamps
Measuring tape
Pencil
Hammer
Sandpaper (various grits)
Steps:
1. Cut the Wood:
Cut the plywood for the bottom and top to the desired size of the chest.
Cut the 1x6" boards for the sides and ends to the desired height of the chest.
Cut the 1x2" boards for the lid frame to the desired length, remembering to subtract ~1/4" for the rabbet (explained below).
Cut the 1/4" plywood for the lid top to the same dimensions as the lid frame.
2. Create a Rabbet on the Lid Frame:
Using a table saw, router, or chisel, cut a rabbet (a groove) on the inner edge of all four lid frame pieces.
The rabbet should be about 1/4" deep and wide enough to accommodate the lid top.
This will create a strong and flush connection between the lid frame and the lid top.
3. Assemble the Sides and Ends:
Glue and screw together the side and end boards to form the four sides of the chest.
Ensure the corners are perfectly square and use clamps to hold the pieces together while the glue dries.
4. Attach the Bottom:
Once the sides are dry, attach the bottom plywood to the base of the chest.
Glue and screw the bottom in place, ensuring it is flush with the sides.
5. Assemble the Lid:
Glue and screw together the lid frame pieces, creating a rectangle.
Align the lid top within the rabbet of the lid frame and glue and screw it in place.
6. Attach the Hinges:
Attach the hinges to the lid frame and the back of the chest.
Ensure the hinges are centered and allow the lid to open and close smoothly.
7. Install the Lid Stay (optional):
If you choose to use a lid stay, install it according to the manufacturer's instructions.
The lid stay will hold the lid open at a desired angle, making it easier to access the contents of the chest.
8. Sand and Finish:
Sand the entire chest, including the inside, with progressively finer grit sandpaper to achieve a smooth surface.
Apply any desired stain, paint, or sealer to protect the wood and enhance its appearance.
9. Enjoy Your New Storage Chest:
Once the finish is dry, you can fill your new chest with your belongings!
Customization Tips:
Size: Adjust the dimensions to suit your needs and available space.
Wood: Experiment with different wood types for various aesthetics and durability.
Finish: Choose a finish that complements your decor and personal preferences.
Hardware: Select hinges and lid stays that match the style of the chest.
Decorative Details: Add moldings, decorative trim, or even brass accents for a more elaborate look.
Safety Precautions:
Always wear safety glasses and ear protection when using power tools.
Use caution when working with sharp tools and ensure a stable work surface.
Follow the instructions provided for all tools and materials used.
Enjoy the process of building your own functional and stylish wooden storage chest!